Showing posts with label desserts. Show all posts

Lemon-Glazed Madeleines


I'm an armchair traveler at heart, and I especially love reading cookbooks that express the heart and soul of other peoples, places and cultures. One of my recent 'seat-side travels' has been to France, where I dropped in on Paris, via this spot-on book by David Lebovitz ~ The Sweet Life in Paris. It's not only full of good recipes, but it's also full of funny stories regarding his trials and tribulations of being an American expat, living abroad in a place that is home to that, je ne sais quoi, way of looking at life.  OK, who's kidding who... it's the (in)famous French attitude that he does battle with on a daily basis. Some times you win, some times you lose...but it's always a treat.

I've so enjoyed picking and choosing some of his recipes to create in my own stateside kitchen, and I've also enjoyed eating them all and sharing some of my creations (some just never made it past me and my mouth). My favorite so far has been his recipe for ~ Lemon-Glazed Madeleines. I was so inspired to make these little French treats toute suite, I just had to order my own madeleine tin online, late on a Friday night, after reading his story/recipe. I must say, they were a HUGE hit, and I highly recommend this recipe for these lovely, little seashell shaped, lemon-kissed gems if you're ever looking for a little bit of the sweet life from Paris...in your own kitchen...without the cost of airfare...or the (in)famous French 'tude. Bon Appétit! 

Strawberry Chia Pudding ~ Meatless Monday


I'd heard about using chia seeds in desserts and was curious about how it would turn out. So, when I saw this recipe for ~ Rich & Creamy Strawberry Chia Pudding, I decided to give it a try. My take on it ~ This is an interesting dessert, with an unusual 'crunch' and a texture that is kinda-sorta like pudding. (it's so trippy how the seeds thicken up the mixture like that) I used dark chia seeds, so mine wasn't as pretty as theirs, but that was OK. My guys weren't too keen on it, they like their pudding smooth, not with a crunch... but I'm glad I tried this superfood sweet treat. It's always fun to try a new spin on traditional foods.


Easy Old-Fashioned Graham Cracker Icebox Cake


Sometimes I like to make a simple and easy to prepare dessert, one that is very forgiving and tastes great. It's my spin on the classic  ~ Old-Fashioned Graham Cracker Icebox Cake.  For my version I line a dish with plastic wrap, leaving the ends hanging out so it's easier to remove at serving time.  Then I just make layers ~ starting with a bottom 'crust' of graham crackers (regular, low fat, fat free or cinnamon); covering that completely with layer of  pudding (I use whatever flavor of instant pudding sounds good at the time, regular or sugar-free);  then a layer of chopped fruit (like thin sliced banana, drained canned peaches/fruit cocktail/Mandarin oranges, shredded coconut or a combo of them all); and then a thin layer of Cool Whip (any variety).  Depending on the size of the dish I'm using, I'll make either two or three layers, ending with the Cool Whip on top, and then adding a sprinkling of crushed graham crackers as a garnish.  I then put the 'Icebox Cake' into the fridge, and let it sit for 8 hours/overnight, that way the moisture will be absorbed by the graham crackers and it will become solid enough to cut. 


When it's time to serve, I just use the plastic wrap to carefully pull the 'cake' out of the dish. It should now be holding its shape and be easy to cut. We like it made in all different flavors, I'll use ~ regular, sugar-free, fat-free or low-fat ingredients ~ just depends on my mood and what is lurking about in my fridge or pantry. This little dessert is also a great way to use up leftover fruit or pudding, and makes little sweet treat odds-and-ends go a bit further.  Gotta love that!


David's Home Baked Bread with 'Chocolate Gravy'


My nephew, David, likes to make this fun, sweet treat ~ Home Baked Bread with 'Chocolate Gravy' ~ for his sons.  A while back he mentioned it on Facebook, and he continues to tease us with photos whenever he makes it. When I asked him where he got the inspiration from, this is what he shared with me ~ I had heard about this many years ago. I looked at a few recipes online and then made my own. :)

I just love it when a certain food inspires you make it, even if it takes you years to get around to it.  It just goes to show... When the timing is right, the kitchen magic happens.  :)  Thanks for sharing your recipe, David!

David's Home Baked Bread with 'Chocolate Gravy'

Ingredients

For the Home Baked Bread...
  • use one box of of your favorite Beer Bread mix, made according to the box instructions, BUT substituting Sprite for the beer
For the 'Chocolate Gravy'...  
  • 3 tablespoons Ghirardelli 100% cocoa
  • 3 tablespoons flour
  • 2/3 cup sugar
  • 1/2 cup hot water
  • 1 cup milk
  • pinch of salt
Directions
In a large sauce pan combine cocoa, flour, and sugar. Add hot water and cook over low heat until dissolved.  Stir constantly.  Once completely combined, stir in milk and salt.  Continue stirring until it becomes thick.  You now have your ole 'Chocolate Gravy'. To serve ~ just slice the bread & dunk.  Enjoy!

Easy Cinnamon Red Hots Mousse


Our friend, Dick, shared one of his mother's old family recipes with me.  It's a simple to make, but big-on-flavor type of recipe that was so very popular in the 1950's & 1960's ~ Cinnamon Red Hots Mousse. It's been enjoyed by his family for generations. It's an easy to make sweet treat that can be served as a dessert in a pretty glass...or as an old-fashioned type of 'sweet fruit salad'.  Just serve it on a lettuce lined salad plate and you've got a hip, retro starter salad.  Your call, it works great at both ends of the meal.  Cool.  Either way we've had it, it's always a favorite.  Who can resist a bit of spicy cinnamon candy slipped into a dish?  Certainly not me.  :)

With its pretty pink hue, I think it would make a nice addition any holiday table, be it ~ Valentine's Day, Easter, or as his mother always did, at Christmas time.  Hope you enjoy this blast-from-the-past recipe as much as we do. 

Easy Cinnamon Red Hots Mousse

Ingredients
  • 1  15oz can of crushed pineapple, with juice
  • 1/2 cup Cinnamon Red Hots
  • 2 cups mini marshmallows
  • 1   8oz container Cool Whip, thawed (regular or fat free)
Directions
Into a large bowl add the crushed pineapple.  Stir in the Cinnamon Red Hots.  Allow mixture to stand in the fridge for 24 hours.  Add marshmallows and Cool Whip, stir well.  Let mousse sit for an hour.  Serve as a dessert or as a starter salad.  Enjoy! 


Easy Peanut Butter-Chocolate Banana Sauce


Wondering what to do with all those really ripe bananas?  Are you sick of making banana bread with them?  If so, may I suggest trying this quick and tasty 'dessert sauce' that I like to make?  Couldn't be easier.  Just throw your really ripe bananas into your food processor and let 'er rip.  Once the bananas are smooth and creamy, add in a couple of spoonfuls of peanut butter or PB2.  Then add in a tablespoon of cocoa powder.  Process again until nice and silky smooth.  Taste...add a bit more cocoa powder if you want a bigger chocolate flavor.  Or...add more peanut butter if you want it more nutty.  If it needs it, add a little sweetener of choice.  Once you've got it tasting the way you want, give it another go-around the processor ~ just for fun.  If you want it a bit thinner, add a little water or milk.  You're in control, do it however it makes you happy.  :)  Use your Easy Peanut Butter-Chocolate Banana Sauce poured over ice cream; drizzled on angel food cake; as a sweet chocolatey dip for strawberries/apples/fruit; dunked with cut up pound cake (kinda like a 'chilled' chocolate fondue); spread over bagels/breakfast cookies/graham crackers; lick it right off the spoon; as an icing on a cupcake that you're going to eat right away...or schmeared over anything else you can think of.  I think it's a pretty darn clean eating way to enjoy your chocolate.  How about you?

Double Chocolate Zucchini Bread


When I made this baked goody, I was feeling the need for a bit of chocolate-ly, sweet baked comfort food.  Having it include some veggie was an added bonus.  This recipe for ~ Double Chocolate Zucchini Bread ~ was a perfect way to go.  I swapped some of the flour for ground oatmeal (oat flour) just to sneak in a little oat goodness.  Chocolate chips just added to the decadent feel of this yummy bread/cake.  We enjoyed it at teatime, as well as for an after dinner dessert.  This is perfect for when you have a bounty of zucchini in late summer, but it's just as good anytime of year.  Give this recipe a try if you've got a craving for chocolate.  I think you'll like, too.  :)


Traditional English Bread & Butter Pudding ~ Meatless Monday


Our friend, Dick, brought over a wonderful English treat for us ~ Traditional Bread & Butter Pudding.  It's a simple to make dessert/breakfast/comfort food that's a favorite of both English children and adults.  I make a bread pudding, but have never had a 'bread & butter' version.  What a treat!!  The two 'puddings' are similar, but making it with buttered bread really does give this version it's own personality.  Dick  made a few adjustments to the recipe, he ~ cut the crusts off the bread slices;  he sprinkled some sugar & cinnamon along with the nutmeg; he skipped the candied citrus peel, only including the lemon zest...and I thought it was perfect made this way. We enjoyed this simple delight with some fat free half & half poured on top.  So yummy!    Here's the link for the recipe ~ It's English 'childhood comfort food' at its very best!


37 Calorie Brownie


I saw a post on Facebook the other day that really got my attention.  It showed a glorious photo of low calorie,  decadent looking brownies.   Oooooo, both Roy & I were instantly smitten!  I made them today and thought I'd share how they turned out.  Sorry to say, this challenged baker couldn't make it work ~ it was a bust.  Even with doctoring them up after they came out of the oven, neither Roy nor I would eat them.  I read through the comments of the post, and it appears quite a few people had the same problem I did.  The brownies did not rise at all, and they were on the bitter side.  On the flip side, other readers just loved them.  I don't know what went wrong.  It was such a shame, I had such high hopes.   I had all the ingredients called for, so I didn't have to make a special trip to the market to make them, but it's still sad to have to throw them out ~ I just hate wasting food.  If anyone who reads this has made them & had success, please share your secret to getting it to work.  For now, I think I'll just stick to my Trader Joe's low cal brownie mix.  You win some.  You lose some.  Real-time baking in my kitchen today.  :)


Quick Tropical Piña Colada Pudding


I was cleaning out the fridge the other day and found a lonely cup of crushed pineapple that needed using up.  I turned it into the star of a 'doctored up' instant pudding dessert.  The pudding was a lovely soft-set texture that we really liked.  We all enjoyed the 'tropical island' flavor combo of the pineapple, coconut and banana.  I just love getting creative with leftovers, especially when they turn out tasting this good ~ Enjoy!

Quick Tropical Piña Colada Pudding
serves 3~4

Ingredients
  • one small box of Banana Cream Jello instant pudding (sugar-free or regular)
  • 1 cup crushed pineapple, drained
  • 1 cup skim milk
  • 1/2 small banana, sliced thin
  • 1/2 tsp coconut extract (optional)
  • 1/4 cup shredded coconut, for topping
  • 4 vanilla wafers cookies, crushed (or you favorite kind)
  • whipped cream, for topping (optional)
Directions
Mix the ~ instant pudding, crushed pineapple, skim milk, sliced banana & coconut extract in a medium bowl until the powdered pudding is smooth & creamy.  Refrigerate pudding until set.  Serve the pudding topped with the shredded coconut, whipped cream and crushed cookies.


Blueberry-Rhubarb Grunt


Blueberry-Rhubarb Grunt ~ Hmmm... the word 'grunt', it sure is a funny sounding name for a dessert, but it really does taste good.  I kinda, sorta made this recipe...I just fudged it a bit.  I did actually follow the recipe/ingredients for the blueberry fruit part....except that I added a handful of chopped rhubarb.  And...instead of the regular 'topping' recipe part, I used a 'just-add-water' pancake mix as the 'dumpling' base.  And then...I just added water, a bit of sugar, vanilla extract & cinnamon to it until it was a 'dumpling drop-able' consistancy.  But after all that, I went back to following the recipe directions. (see, just a few minor detours :)    It was a dessert that cooked on the stove top as we ate our dinner, and it was ready to enjoy, just as we finished our meal.  We devoured it quickly...with no dessert leftovers hanging around here that night.  That's always the sign of a good dessert in my book, no matter what recipe you may (or may not) follow.  tee hee  :)


No-Bake Cool Summer Pies


I'm a big fan of no-bake pies and so is my family.  I usually get the inspiration to make one from the back of the Jello gelatin and pudding boxes,  Knox Gelatin boxes, the ready made graham cracker pie crust labels, some of Grandma Bunni's old 1960's cookbooks /recipe pamphlets and from surfing the 'Net.  Sometimes I follow the directions and sometimes I improvise and add my own spin.  It's all good!

I also find a lot of fun, old-time recipes from church and school fundraiser cookbooks.  Now that summer is here, we'll be enjoying a lot more of these quick and easy desserts.  I make them with low-fat ingredients and either sugar-free or regular, depending on what boxes of Jello or pudding that I have on hand.


Time to start searching for the next no-bake, cool and creamy treat ~ Let the desserts of summer begin!


Homemade Strawberry Shortcake ~ from our homegrown strawberries...


Our spring has been lackluster and the garden has suffered for it.   The last time I had checked the strawberry bed, the little berries were small and green.  I had (quite frankly) forgotten about them, so imagine my surprise when my son & his friend came into the house with two big, red strawberries.  The kids said there were lots more out there.  When did this happen??  So, I gave them some bowls to pick whatever ripe strawberries they could find.  I was very pleased when they brought back enough to make a dessert ~ Nice!

I looked around and found this recipe for (a healthier) strawberry shortcake.  It called for basic ingredients which I always have on hand and the recipe was easy to make/follow ~ even for this challenged baker.  :)   I did try using the pastry blender to  combine the butter and flour, but got frustrated pretty quick and ended up just using my fingers.  (soooo much simpler!)  I made a few changes to the original recipe ~ I added an extra teaspoon of sugar to the shortcake batter, as well as a teaspoon of vanilla extract; I used fat free Greek yogurt and sweetened it with honey instead of sugar and used a splash of vanilla extract instead of the lemon zest (my guys like vanilla flavor more than lemon flavor).  I made the shortcakes bigger, so came up with three instead of four.  What a marvelous, light, rich and tasty shortcake.  More real-time baking in my kitchen tonight.  :)

School is now out for the summer ~ Let the games begin!


Apple Mug Muffin ~ ready in 2 minutes


This evening, I was looking around on Pinterest and saw a pin for this recipe, that came from the blog ~ Civilized Caveman.  It was for an ~ Apple Mug Muffin ~ a quick microwave recipe that's ready in 2 minutes.  The photo looked good, it was for a single serving, the recipe was gluten-free, there was no added refined sugar, it said it was good for breakfast or dessert, I was hungry and I had most of the ingredients...so, off to the kitchen I went.

I did make a couple of substitutions ~ replacing 1/2 the coconut oil (I actually used melted Olivio Coconut Oil Spread) with unsweetened applesauce (to make it a little lower in fat); honey for the maple syrup (all outta maple syrup); chopped walnuts/cinnamon for the 'streusel topping' (couldn't be bothered to chop that little bit of apple); and I nuked it in a custard cup instead of a mug (just 'cause I felt like it...shoulda used the mug :) .  The resulting 'muffin' was surprisingly good, with a subtle sweetness and flavor.  To me, it had more of a substantial cooked 'egg custard' feel to it.  I'm a fan of that 'egg-y custard' flavor, so it was right up my alley.  Since it uses almond meal instead of flour, it has a denseness that you wouldn't get from a regular microwave-in-a-cup muffin.  I think it would make a quick and tasty breakfast...but for tonight, it was my dessert.  Yup, real-time cooking in my kitchen!  Now, I need to eat dinner ~ tonight was one of those eat-dessert-first kinda evenings.  teehee


Mocha-Chocolate Chip Brownie Cupcakes ~ quick, easy and egg-free


The other day I was in the mood for some cupcakes, and since my favorite cupcake shop was already closed for the day, I decided to make a quick batch at home.  They aren't fancy like SugarBean's, but we enjoyed them all the same.  I tried to 'healthy' them up a bit, so I replaced 1/2 the flour with whole wheat pastry flour; replaced 1/2 the oil with applesauce; and cut back on the salt.   J thought they tasted like a brownie, so I'm calling them ~ Mocha-Chocolate Chip Brownie Cupcakes.  I modified this chocolate cake recipe that I posted about last year, giving it more of a mocha spin in the batter as well as the icing. I decided to add some chocolate chips to the batter, for an extra little hit of chocolate.  (look at me, getting all fancy!)

Quick and easy, as well as egg-free ~ Booyah!  If you use a vegan 'butter' in place of the regular butter, than it will be dairy-free as well.  I think they are best enjoyed cold and (to me) they taste better after the first day, that way the flavors and texture really set-up nicely.  Enjoy!


Mocha-Chocolate Chip Brownie Cupcakes ~ egg free 
makes 12 cupcakes


Ingredients
  • 3/4 cup all purpose flour
  • 3/4 cup whole wheat pastry flour* *(or skip the whole wheat pastry flour & use all regular flour, if you like)
  • 1 cup sugar
  • 3 Tbsp unsweetened cocoa powder
  • 1 tsp ground cinnamon
  • 1 tsp baking soda
  • 1/2 tsp salt
  • 1 cup cold water
  • 3 Tbsp canola or vegetable oil
  • 3 Tbsp unsweetened applesauce
  • 1 1/2 Tbsp instant coffee, dissolved in 1 Tbsp warm water 
  • 1 Tbsp white or cider vinegar
  • 1 tsp vanilla extract
  • 1/3 cup chocolate chips or carob chips  
Directions
Preheat oven to 350 degrees.  Line muffin tin with paper cupcake/muffin liners.  In a large bowl sift the first 7 dry ingredients (flours - salt) together.  Add all the liquid ingredients and stir until blended.  Fold in the chocolate/carob chips. Divide the batter between the 12 cupcakes liners and bake for approx. 15-20 minutes, or until they're done. (timing really depends on how full they are, mine were quite full & closer to 20 minutes)  Remove cupcakes to cooling rack.  Let cool completely, then frost.


Mocha Frosting
  • 1 1/2 cups powdered sugar
  • 2 Tbsp unsweetened cocoa powder
  • 3 Tbsp unsalted butter, softened
  • pinch of salt
  • 1 Tbsp instant coffee, dissolved in 2 Tbsp water
Directions
In a medium bowl sift the dry ingredients together.  Add butter and mix until well blended. (it will be very dry)  Add the coffee and mix well. (now it looks right!)  Spread over the the cooled cupcakes.  These taste best when completely cooled or chilled.  Store in fridge.  I think they get even better the next day(s).


SugarBean Cupcakes ~ Gourmet artisan cupcakes & treats, all wrapped up in Midwest small town charm


Today, I had the pleasure of discovering a wonderful, delightful, charming and all-together amazing gourmet artisan cupcake bakery, it's called ~ SugarBean Cupcakes.  They're nestled in the small town of Cicero, Indiana.  I've passed by this shop often, as I'm traveling back-and-forth down Hwy. 19, usually after swinging by Morse Lake, or doing other shopping/errands in the area.  I've always meant to go in ~ the purple painted porch on the old Victorian home continually caught my eye, but I was always on my way to somewhere else.  Today, I made the time to stop in, and I'm so glad that I did.

(photo source ~ SugarBean Cupcakes)
When I entered the shop, I was warmly greeted by Cheryl and Stephanie, the mother/daughter duo who are the creative force behind these incredibly delicious cupcakes.  I was so impressed with the abundant cupcake selection ~ two bakery cases full of jewel colored eye-candy!  It's all so beautifully presented, you can really see all the love and care that goes into these little beauties.

I was only going to buy one cupcake, but I just couldn't make up my mind. I was just so tempted...  So much so, that I came out with eight(!) different flavors.  Who could resist?  (certainly not me, this challenged baker knows a good thing when she sees one!)  So far, we've sampled/swooned over the ~ Salted Carmel, the Blue Raspberry Lemonade and the Strawberry Chocolate cupcakes...and the evening isn't over yet! 
 
 I'm so thrilled to finally have a place like this so close to home!  It's on par with my favorite bakeries from back home in Los Angeles and Denver.  Who knew Cicero had such a little gem?!  This panorama shot gives you an idea of just how cute this little cupcake shop truly is! (photo source - SugarBean Cupcakes)


They had somewhere around a dozen different cupcake flavors/baked goodies, and the selection changes daily.  They stay open until they sellout and I'm betting that with taste treats this beautiful and delicious, they probably go home pretty early most days! 


The cupcake shop is located on the ground floor of a converted, turn-of-the-century Victorian home and they've made it so pretty inside.  You can take your little baked treasure home, or, enjoy it there.    This will be my new hangout when I want to pamper myself.  I can see this as my new go-to for a fantastic and impressive dessert ~ without any effort on my part.  I also think this would be a GREAT place for 'The Girls' (old, young or young-at-heart) to have a little impromptu get-together, so they could have a cuppa tea/coffee, a little something sweet, and, as my English hubby would say ~ a good 'natter.  What a fabulous way to make your day just a little extra special!


This time, I had to take my boxed, baked goodies to go, but next time, I'm going to stay and savor my beautiful cupcake with a cup of coffee, and enjoy some chit-chat.  I'm sure I can tempt my hubby to go with me too, since they also have cinnamon rolls, scones, muffins and cookies. 

Cheryl & Stephanie ~ It was so nice to meet you both!  I  entered your shop as a guest, but I do feel like I left as a friend...and that was such a nice way to end my day.  Thank you both so much!! 


Show SugarBean Cupcakes some love on Facebook!  Even if you don't live close enough to try them yourself, you'll still enjoy seeing all the beautiful and colorful pictures of their daily cupcake specials.  The ever-changing, daily array of amazing flavors might just make you hop into your car for a road trip! (they really are that good! :)  See ya there!


Oat Bran ~ it's not just for breakfast anymore...


I've been eating a lot of oat bran lately, and have begun to enjoy it as a savory dish as well as a sweet dessert.   For the savory side, I add some chopped nuts, fresh chopped herbs, spices, Braggs and spray butter.  It satisfies my craving for something savory, but still gives me the benefit of oatmeal.


Same thing goes with eating oat bran as a dessert.  I make extra in the morning and save some in the fridge for later.  I take it out after it's chilled and then add in some cardamon (for an Indian-flavored spin) or cinnamon, a packet of Equal or maybe some maple syrup and give it a quick stir (I like to leave it a bit chunky when eating it cold).  Then add a splash of milk. YUM!!  It once again satisfies my craving for a sweet dessert, but I'm still getting all the goodness of oats.  I love when a food can do double or triple duty!

Official Fish Fingers & Custard Day ~ Who, is with me...


Today is April 3rd, and it's officially ~ Fish Fingers & Custard Day!  I never thought I would be writing about those two items, at least not in the the same sentence...but, here I am.  Maybe you've eaten them yourself, maybe even at the same time.  Chances are, if you have, then you too, are a Whovian and a true fan of the BBC TV show 'Doctor Who', just like us.  :)

A bit of back story:  Last year, J & I discovered the BBC TV show ~ Doctor Who.  We were utterly charmed by the actor Matt Smith, who took over the controls of the TARDIS & became the 11th regeneration of Doctor Who.  As J says, 'It's brilliant!'  (he's picked up that phrase from his English dad)  This, coming from a 8 year old, is high praise indeed.  If you've never seen Doctor Who, (or even if you have) check out this foodie inspired clip from the episode ~ The Eleventh HourThis is when the meal ~ Fish Fingers & Custard ~ was invented.  It's one of the funniest food scenes I've ever seen...


I've cooked this unusual food duo and it makes for a surprisingly good meal.  Over here in the US, to us Yanks, Fish Fingers = Fish Sticks. Custard = Pudding, and to me, the custard/pudding becomes a mellow stand-in for tarter sauce...and it really works together!

Since we're on this side of the pond... (ahh...Pond.  Oh, Amy & Rory ~ we MISS YOU!), you could serve it with a traditional English custard mix like ~ Bird's Custard (I happen to keep a container in my pantry, for occasions when I want an English custard), OR you could just use good ol' Jello Brand 'Cook & Serve' Custard, OR just use a vanilla or tapioca pudding cup ~ they would all be good!  So, if you're looking for an unusual, out-of-this-world (or universe) meal, then give it a go.  We enthusiastically give it two-thumbs up, and as you can see from the video clip ~ it's Doctor Who approved!  teehee  :)     


No-Bake Pizzelle Strawberry Layer Cake


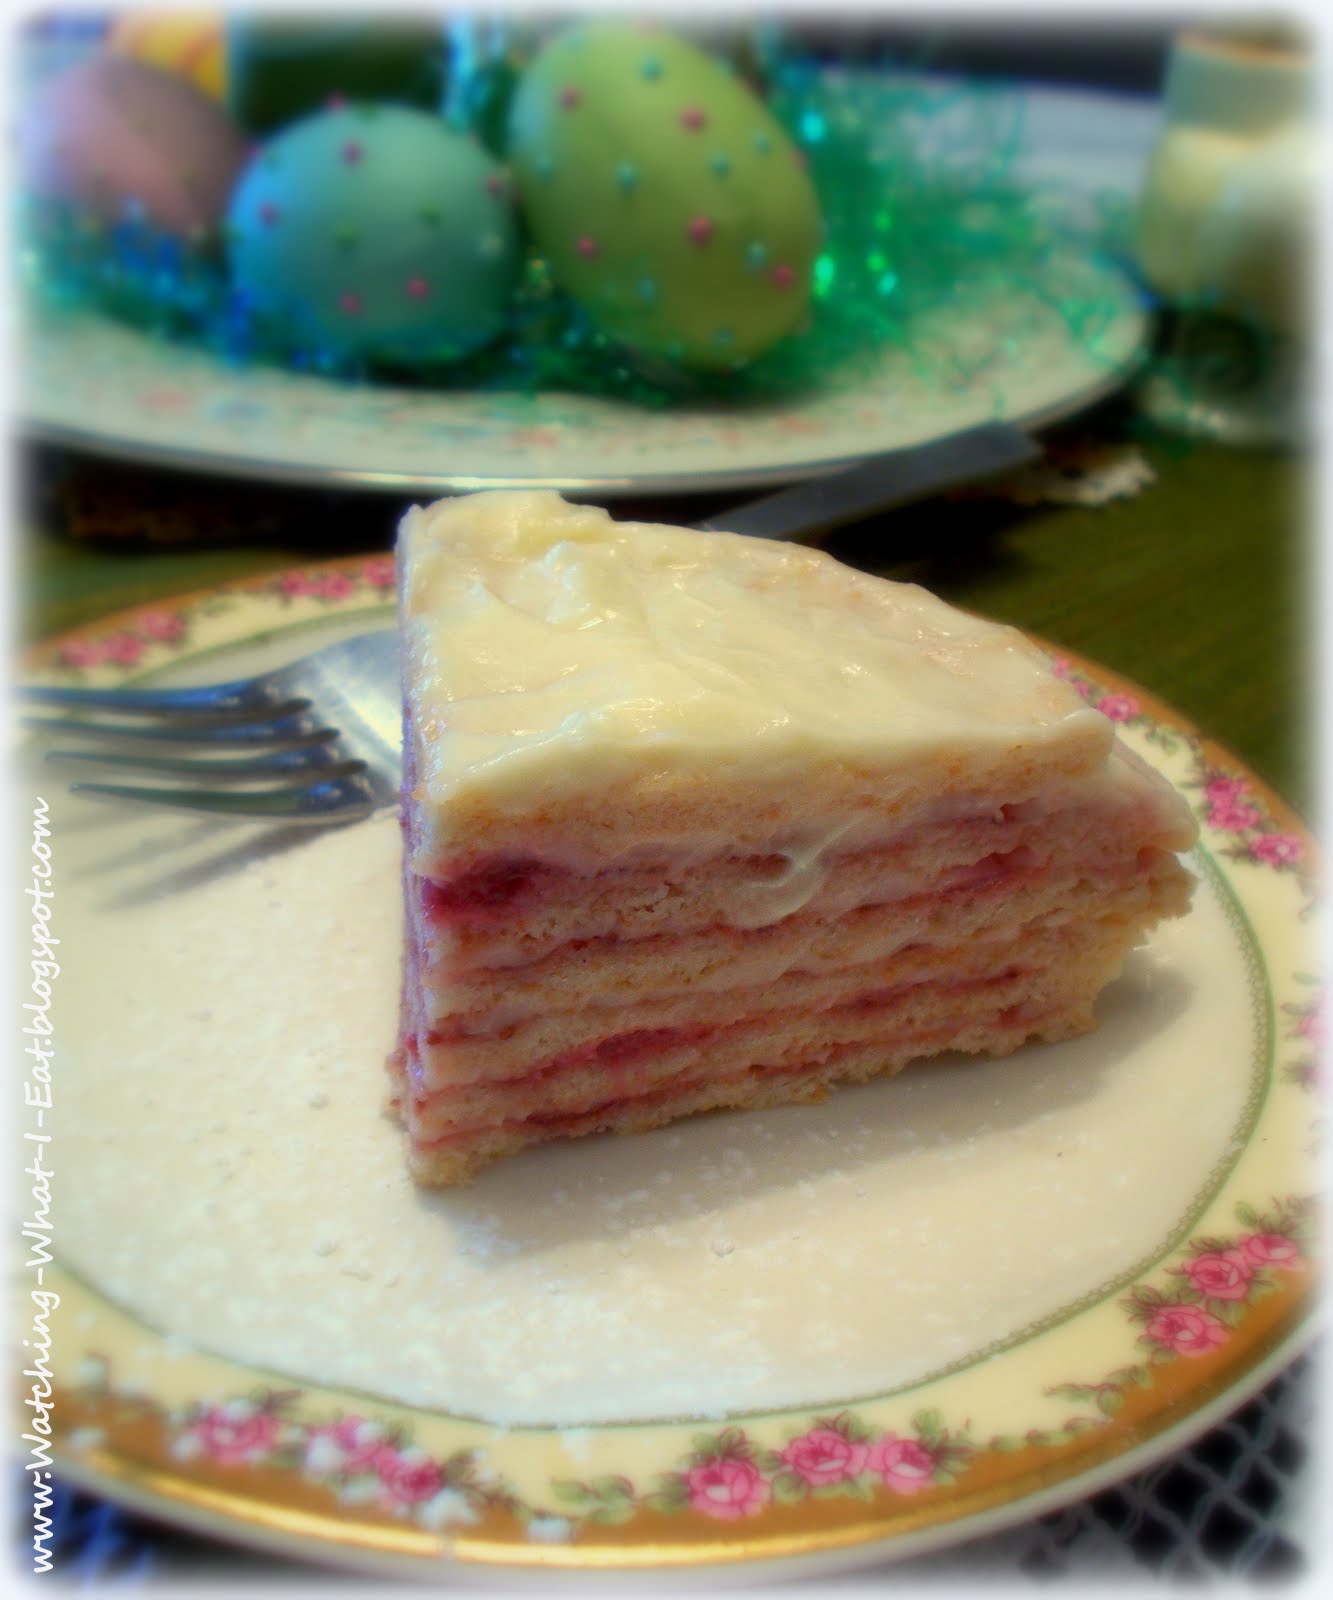
I bought a near-new pizzelle maker at Goodwill a few weeks ago.  I've been searching the web, looking for healthy(er) pizzelle recipes and kept seeing how pizzelles are often one of the cookies served at an Italian Easter celebration, so I thought it would be fun to make a batch for the upcoming Easter holiday.  I found this basic recipe and tweaked it a bit.  I replaced half the flour with whole wheat pastry flour, used only egg whites, replaced the anise extract with vanilla extract and used avocado oil instead of the butter.  The pizzelles turned out OK, but were not great.

Since I had so many cookies, I started looking for different ways to use them, and came across this site that gave a recipe for a pizzelle pie.  Hmmm... Sounded interesting, so I tinkered with it a smidgen and made my own adapted version.  We really liked it, so much so, that I'll be making another No-Bake Pizzelle Strawberry Layer Cake for our Easter dinner.   I see endless possibilities with this no-bake dessert.  Guess I'll need to perfect that healthier pizzelle recipe, not for the cookie's sake...but for the cake's.  :)

No-Bake Pizzelle Strawberry Layer Cake
serves 2-4

Ingredients
  • 5 to 7 pizzelle cookies ~ or as many as you want, to get it as high as you want (homemade or store bought, anise or vanilla flavored ~ as you like)
  • 1 small box of vanilla instant pudding mix, prepared according to box directions (or flavor of choice ~ regular or sugar-free)
  • strawberry jam or jam flavor of choice (I used homemade ~ see my post on my homegrown/homemade strawberry jam from last year)
  • powdered sugar for dusting or whipped cream for topping (optional)  


Directions
Spread about 2 teaspoons of jam on the top of each pizzelle, all the way to the edge. Place first jam covered cookie in a suitable container*, then spoon over about 1 1/2 - 2 Tablespoons of vanilla pudding, on top of the jam, smoothing all the way to the edge.  Place next jam covered cookie on top of the now pudding covered cookie and continue layering this way until you are all done, ending with a pudding covered cookie on the top.  Cover the now completed 'layer cake' and let it sit in the fridge overnight.  It will begin to absorb the moisture from the jam/pudding and turn into a pretty and delicate looking layer cake.  Cut into wedges and serve with a dusting of powdered sugar or top with whipped cream, if desired.

*if you want to be able to remove the layer cake easily for presentation, place a strip of plastic wrap in the bottom of the container, with the edges hanging over the edge of the container and use that to lift the whole layer cake out when ready to serve the next day.


I think this would be good with a tiramisu spin, or maybe with marmalade and some type of liqueur ~ the possibilities are endless.  I really like the idea of making it the night before and just pulling it out of the fridge when you need it.  A no-fuss, no-stress dessert, I like that!    

Happy Easter ~  From our family to yours!


Meyer Lemon Honey Almond Cake


A few weeks ago, I was tinkering around with a lemon cake recipe that I made/posted about last year, trying to see if a bit simpler method would yield a more lemony cake.  Happy to report, the new lemon cake was even more full of the sweet/tart goodness of my favorite citrus ~ the Meyer lemon.  More changes that I made to the original recipe were ~ using all egg whites this time around, replacing some of the sugar with honey and pureeing the Meyer lemons fresh (not cooked), peel-and-all.   It made for a bright, robust flavor that I really enjoyed.  This Meyer Lemon Honey Almond Cake is wheat-free and dairy-free.  It's a really enjoyable dessert, tasty teatime treat or snack for us.  If you wanted to add a little something extra, maybe drizzle on a quick glaze or a sprinkling of powdered sugar to dress it up, or eat it plain/naked.  teehee  :)  Enjoy!

Meyer Lemon Honey Almond Cake
adapted from this recipe
Ingredients
  • 3 Meyer lemons ~ cut into wedges & seeds removed
  • 2 1/4 cups almond meal
  • 1 cup egg whites (I used eggs whites from a carton)
  • 7 Tbsps sugar
  • 1/4 cup honey
  • 1 tsp vanilla extract
  • 1 tsp baking powder
  • pinch of salt

Directions
Preheat oven to 350 degrees.   Grease a cake pan and cut a piece of parchment paper to fit into the bottom. (so it will be easier to remove)

In a small food processor, puree Meyer lemons (skin & all) with honey until smooth.  Combine the pureed honey/lemon with the sugar, egg whites, vanilla extract and salt and stir until smooth.  Pour into a mixing bowl and add the almond meal and baking powder, stir until well combined.

Let batter sit 10 minutes, then pour into prepared cake pan and tap/smooth batter.  Bake for approx 40-60 minutes or until toothpick tester comes out clean.  Let cool in pan, run a knife around edges to loosen, then remove to cooling rack.  Or, just keep in the cake pan and serve from there.  Cake will get moister the longer it sits.  Store in a covered container, it will last longer if kept in the fridge. 


Related Posts Plugin for WordPress, Blogger...